Pro-Doweling Jig Kit 840
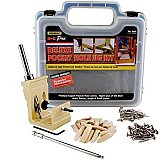
The Pro Doweling Kit is a simple tool for making fast, accurate dowel holes in furniture and other carpentry projects.
Just slide the jig over the wood surface and use the revolving turret to drill precise dowel holes.
The Jig accepts 6 bit sizes and will fit boards up to 4” thick.
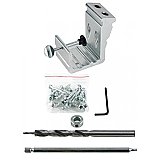
This professional kit includes three brad point drill bits, as well as dowel pins and centers, drill stops, a hex wrench and carpenter’s glue.
Pro-Doweling Jig Kit Features:
- For end-to-end, edge-to-edge and edge-to-end doweling.
- Unique revolving turret design is extremely accurate and simple to use.
- Accepts 6 sizes of twist bits: 3/16”, 1/4”, 5/16”, 3/8”, 7/16” & 1/2”
- Professional Kit includes the following accessories:
- 3 brad point drill bits: 1/4”, 5/16” and 3/8”
- 30 dowel pins: 10 of each 1/4”, 5/16” and 3/8”
- 3 drill stops: 1/4”, 5/16” and 3/8”
- 6 dowel centers: 2 of each 1/4”, 5/16” and 3/8”
- 1 hex wrench
- Craft glue
- Guide bars are graduated for fast positioning of hole center.
- For use on boards up to 4” thickness.
- Rust resistant plated turret and parts.
- Includes instruction booklet.
1. Place the two boards flush together with the doweling surfaces on both facing upward.
2. Using a square, draw a line across both boards through the center of the intended dowel hole locations.
3. Open the camp screw and attach the Dowel Jig, spanning both boards.
4. Use the index mark on the Jig’s fixed end to align the Jig with the line you drew in step #2.
5. Tighten the clamp screw to pull the two boards together.
6. Loosen the screw on the Jig’s slide and move the turret to the desired hole location.
7. Use the ruler on the Jig’s slide and mark down the measurement at the end of the arrow.
8. Tighten slide lock screw.
9. Lift turret and turn until you match the size of your drill bit. The turret will snap in place when properly situated.
10. Drill dowel hole to required depth.
11. To move to the next dowel hole, loosen the clamp and slide entire assembly sideways
-
ManufacturerGeneral Tools and Instruments
-
Features:For end-to-end, edge-to-edge and edge-to-end doweling.
Unique revolving turret design is extremely accurate and simple to use.
Accepts 6 sizes of twist bits: 3/16”, 1/4”, 5/16”, 3/8”, 7/16” & 1/2”
Professional Kit includes the following accessories:
3 brad point drill bits: 1/4”, 5/16” and 3/8”
30 dowel pins: 10 of each 1/4”, 5/16” and 3/8”
3 drill stops: 1/4”, 5/16” and 3/8”
6 dowel centers: 2 of each 1/4”, 5/16” and 3/8”
1 hex wrench
Craft glue
Guide bars are graduated for fast positioning of hole center.
For use on boards up to 4” thickness.
Rust resistant plated turret and parts.
Includes instruction booklet.
Related products
Customers who bought this product also bought


